Mini Split Installation Made Simple – Can You Do It Yourself?
Understanding Mini Split Installation: The Simple Truth
Are ductless mini splits easy to install? The answer depends on your skill level and the complexity of your specific setup. Here's what you need to know:
Installation Difficulty Overview:- Professional installation: 3-4 hours for single-zone systems- DIY installation: Possible with pre-charged kits, but requires basic HVAC knowledge- Main challenge: Requires drilling a 2-3 inch wall hole and handling refrigerant lines- Electrical work: Often needs dedicated 220V circuit and licensed electrician- Permits: May be required depending on local codes
Mini splits have gained popularity because they offer targeted heating and cooling without extensive ductwork. Unlike traditional HVAC systems that can take days to install and require major renovations, mini splits need only a small wall penetration to connect indoor and outdoor units.
The installation process involves mounting an indoor air handler, drilling through the wall, connecting refrigerant lines, and setting up the outdoor condenser. While manufacturers offer DIY-friendly kits with pre-charged refrigerant lines, most installations still benefit from professional expertise especially for electrical connections and system commissioning.
As Alex Wiltz, founder of Air Pros Heating & Cooling, I've installed hundreds of mini split systems throughout my HVAC career and frequently help homeowners understand whether are ductless mini splits easy to install for their specific situation. My experience shows that while these systems are simpler than traditional HVAC installations, success depends heavily on proper planning and execution.

How Ductless Mini Splits Work & Why They're Popular
If you're wondering are ductless mini splits easy to install, understanding how they work helps explain why they're becoming the go-to choice for homeowners looking to upgrade their comfort without the hassle of major renovations.
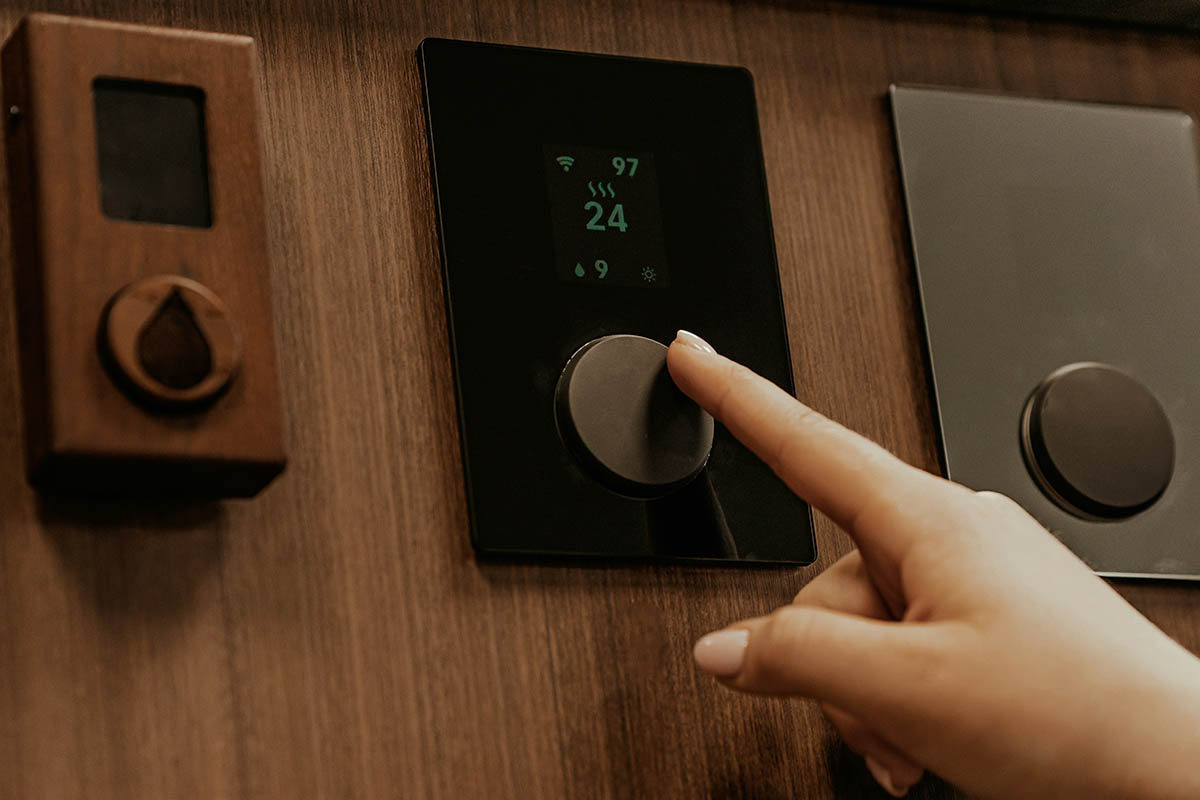
At their core, mini splits use heat pump technology to move heat rather than create it. The indoor air handler (the quiet one that lives inside your room) and the outdoor condenser unit (the hardworking one that sits outside your home) work together through refrigerant lines that carry coolant back and forth.
The inverter compressor inside the outdoor unit adjusts its speed based on what your room actually needs, like having a dimmer switch for your comfort much more efficient than old-school systems that constantly turn on and off.
Mini splits eliminate ductwork losses traditional systems can lose up to 30% of their heating or cooling energy through leaky ducts. Mini splits deliver conditioned air directly into your space.
Modern mini splits run at around 19 decibels literally quieter than a whisper. Each indoor unit creates its own zone, so you can have different temperatures in different rooms without fighting over the thermostat.
More info about mini split basics
Key Benefits in a Nutshell
Room-by-room comfort means everyone in your family can be happy. Each indoor unit operates independently, so you're only conditioning the spaces you're actually using.
Energy savings are significant with efficiency ratings reaching up to 28.5 SEER2 for cooling and 18 HSPF2 for heating. That inverter technology continuously adjusts output to match exactly what your space needs.
Quick retrofit installation is a game-changer. Instead of tearing apart walls to install ductwork, mini splits need only a small wall hole to connect the indoor and outdoor units.
Improved air quality comes naturally with mini splits. Each indoor unit has its own filtration system, and without miles of ductwork collecting dust and allergens, your air stays cleaner.
Are Ductless Mini Splits Easy to Install?
Are ductless mini splits easy to install? The honest answer is that they're much simpler than traditional HVAC systems, but "easy" depends on your comfort level with home improvement projects and electrical work.
Here's what makes mini splits appealing: you only need to drill one 2-3 inch hole through your wall. Compare that to installing traditional ductwork, which might involve tearing into walls, crawling through attics, and disrupting multiple rooms.
Pre-charged refrigerant lines are a game-changer for installation simplicity. Most systems come ready to go for runs up to 25 feet, eliminating the need for specialized refrigerant handling equipment and EPA certification.
A professional can typically complete a single-zone installation in 3-4 hours, while a traditional HVAC system might take several days. Many manufacturers now offer DIY kits specifically designed for homeowners with step-by-step instructions and pre-charged lines.
But let's be realistic about the challenges. Most mini splits need a dedicated 220-volt electrical circuit, which means calling an electrician unless you're already comfortable with electrical work. Wall type makes a huge difference drilling through an exterior wall is straightforward, but routing lines through interior walls or up to second floors becomes much more involved.
Traditional HVAC vs Mini Split: What's Easier?
Installation AspectTraditional HVACMini SplitDuctwork RequiredExtensive - throughout homeNone - single wall penetrationDemolition/ConstructionOften significantMinimal - one 3" holeProfessional Labor Hours2-5 days3-8 hoursRefrigerant ComplexityHigh - field charging requiredLow - pre-charged systems availableElectrical WorkComplex - multiple zonesSimpler - point-to-point connections
Factors That Make Installation Easier or Harder
Unit size and number of zones play big roles. A single 12,000 BTU unit for one room is manageable, but multi-zone systems really benefit from professional expertise.
Your home's construction matters significantly. Modern homes with standard wood framing are ideal, while older homes with thick masonry walls or complex layouts present unique challenges.
Line-set length determines whether you can use pre-charged systems. Standard kits work for runs up to 25 feet, but longer distances require additional refrigerant and professional charging equipment.
Electrical service capacity affects project scope. If your electrical panel is maxed out, you'll need an upgrade before installing the mini split, especially common in older homes.
DIY vs Professional: Choosing Your Path

A DIY single-zone install can save $1,500–$3,000 in labor, but only when the project is straightforward and you already have the necessary tools.
When DIY Makes Sense
- Pre-charged, single-zone kit
- Exterior wall backs directly to outdoor unit
- Electrical panel has an open 220 V slot
- You’re comfortable using drills, hole saws, torque wrenches and a multimeter
When to Call a Pro
- Multi-zone or runs longer than 25 ft
- Panel upgrades or tight attic/crawl-space work
- Local code requires a licensed installer for the permit
- You want full parts-and-labor warranty protection
Professionals bring EPA 608 certification, liability insurance, and handle permits and inspections worth considering if you value peace of mind and resale documentation.
Step-By-Step Mini Split Installation Roadmap
Getting ready to install your mini split? Here's your complete roadmap from planning to enjoying perfectly conditioned air.
Planning is everything when it comes to mini split installation. Start your planning phase 1-2 weeks before installation for proper load calculation and sizing follow ACCA Manual J guidelines to ensure your unit matches your space's needs. During planning, select and order your unit, apply for required permits, and assess your electrical service capacity.
Installation day preparation makes the difference between a smooth project and a stressful one. Check the weather forecast wind and rain turn a manageable job into a nightmare. Clear your work areas both inside and outside, and verify all components are present.
The installation sequence minimizes backtracking: indoor unit mounting, wall penetration and line routing, outdoor unit setup, connections, and thorough system testing. Indoor unit placement and mounting typically takes 1-2 hours, drilling and routing the line-set adds another hour, outdoor unit setup takes 30-60 minutes, and pressure testing and system commissioning requires 1-2 hours.
More info about Ductless Mini Split Installation
1. Sizing & Load Calculation
Getting the size right is absolutely critical and it's where many DIY installations go wrong. Professional load calculation using ACCA Manual J is the gold standard for sizing. This comprehensive analysis looks at your home's insulation levels, window types, orientation, occupancy, and local climate patterns.
Many homeowners try rule-of-thumb sizing usually 20-25 BTU per square foot for cooling in moderate climates. While this gives you a ballpark figure, it's like using an old map it might get you close, but you'll probably miss important details.
Here in Utah, climate considerations are especially important because our weather varies dramatically. Higher elevations with brutal winters need units that can still pump out heat when it's well below freezing outside.
BTU selection isn't just about square footage it's about your specific situation. That sun-baked west-facing bedroom needs more cooling power than the shaded basement family room. For multi-zone systems, each area gets its own load calculation based on use, occupancy, and exposure.
2. Indoor Unit Placement & Mounting

Key placement rules:
- Height: 6–7 ft above the floor for proper air mixing.
- Structure: Lag bolts into two studs units weigh 25–40 lb and vibrate.
- Clearance: 6 in from the ceiling, 2 ft from side walls or tall furniture.
- Environment: Avoid direct sun, fireplaces, or walls with hidden plumbing.
- Efficiency: Pick the wall that gives the shortest, straightest line-set run.
Use a stud finder, level the bracket, pre-drill pilot holes, and skip drywall anchors. A level mount keeps condensate draining outdoors instead of into your room.
3. Drilling & Routing the Line-Set
Drilling the 2–3 in hole is the moment of truth, but patience and the right tools make it easy.
- Drill a pilot hole from inside; confirm the exterior exit point is clear of utilities.
- Cut the full hole from outside at a slight downward angle (≈¼ in per foot) for drainage.
- Tape refrigerant lines, drain tube, and control cable into a tidy bundle every 12–18 in.
- Slide the bundle through a plastic wall sleeve and seal with exterior-grade silicone or putty to block drafts and insects.
Avoid kinks and keep that downward slope both are critical for long-term reliability.
4. Outdoor Unit Setup & Connections
Choose a level, shaded spot with 24 in of clearance around the condenser. A precast concrete pad is easiest; wall brackets work for small systems.
Add rubber vibration pads under the feet and install a weatherproof disconnect box within sight of the unit, as required by code.
Quick-connect fittings tighten with two wrenches; traditional flare fittings need 18–22 ft-lb of torque. Route the condensate line to grade and angle landscaping so water flows away from the foundation.
5. Pressure Testing, Vacuum & Start-Up
This technical phase safeguards the compressor and keeps your warranty intact.
- Pressurize with nitrogen to 500 psi for 30 min any drop means a leak.
- Pull a deep vacuum to 150–350 microns to eliminate air and moisture.
- Slowly open the service valves to release the factory refrigerant.
- Test both heating and cooling, verify temperature split, and listen for odd noises or short cycling.
Many DIYers hire a pro just for this step because the specialized gauges and pumps pay for themselves in peace of mind.
Post-Install Maintenance & Performance Optimization

Once your mini split is installed, proper maintenance and optimization ensure peak performance. While ductless mini splits are easy to install, keeping them running efficiently requires consistent care.
Immediate post-installation steps include testing every function on your remote control and checking that water drains properly from the indoor unit during your first cooling cycle.
Performance optimization turns a good installation into a great one. Program thermostat schedules to match your routine this alone can save 10-15% on energy costs. For multi-zone systems, develop a zoning strategy that closes off unused rooms and redirects conditioning to occupied spaces.
More info about Mini Split Service
Routine Care Schedule
Monthly filter maintenance is your most important task. Clean filters improve efficiency by up to 15%. Remove the front panel and gently wash filters with warm, soapy water. Let them dry completely before reinstalling.
Seasonal maintenance aligns with Utah's distinct seasons. Spring preparation involves cleaning the outdoor coil and testing heating function. Fall preparation focuses on cleaning indoor coils and testing cooling before winter shutdown. Winter care requires keeping your outdoor unit clear of snow buildup.
Annual professional service catches problems before they become expensive repairs. A qualified technician will check refrigerant levels, inspect electrical connections, evaluate performance, and perform deep cleaning beyond homeowner maintenance.
Common Installation Mistakes to Avoid
Electrical issues top the list of problems. Undersized wire gauge can cause voltage drops and fire hazards. Improper grounding creates safety risks during power surges.
Mechanical problems include over-tightened flare connections that crack and leak, and poor condensate drain slope leading to water backup the drain should slope at least 1/4 inch per foot.
System commissioning errors like skipping the vacuum process leave moisture that can freeze and damage components, while improper refrigerant charging reduces efficiency and can damage the compressor.
Frequently Asked Questions about Mini Split Installation
What permits or licenses are required?
Most cities in the Salt Lake Valley require a building permit plus an electrical permit for the new 220 V circuit. Homeowners can often pull them, but inspections are mandatory. Anyone purchasing refrigerant or servicing systems for pay must hold EPA 608 certification.
How long does a typical installation take?
Pros finish a single-zone in 3–6 hours and a 2–3-zone project in one day. First-time DIYers should allow a full weekend for a single zone; each extra zone can add half a day.
How much does professional installation cost?
Single-zone systems (equipment + labor) usually run $2,000–$5,000 in the Salt Lake market. Two to four zones start near $4,000 and can exceed $10,000 when line-sets are long or panels need upgrades. Labor is roughly one-third of the total, so real DIY savings depend on complexity and tool costs.
Conclusion & Next Steps
So, are ductless mini splits easy to install? After walking through everything from planning to start-up, here's the honest answer:
If you're a professional HVAC technician, mini splits are definitely on the easier side. You can knock out a single-zone system in 3-4 hours versus spending days running ductwork throughout someone's home. That's a pretty sweet deal for both you and your customers.
For the handy homeowner who loves a good weekend project, mini splits can be surprisingly manageable but only if you're realistic about what you're getting into. Those pre-charged DIY kits have been a game-changer, eliminating the trickiest part of the job. If you can mount a heavy TV, drill precise holes, and follow detailed instructions without cutting corners, you might just pull this off.
For most homeowners though, the smart money is on professional installation. You might save some cash going DIY, but when you factor in safety concerns, warranty protection, and the peace of mind that comes with knowing it's done right, professional installation often wins out.
The key factors that determine your success boil down to a few critical questions: Do you have the right tools and skills? Are you comfortable with electrical work? Do local codes require permits and inspections? Can you honestly assess whether this project matches your abilities?
At Air Pros Heating & Cooling, we've been installing mini splits throughout the Salt Lake Valley for years. We've seen DIY installations that worked beautifully and others that... well, let's just say they required some expensive fixes. The difference usually comes down to preparation, realistic expectations, and knowing when to call in the pros.
Whether you're in Salt Lake City dealing with valley heat, up in Park City where mountain winters demand reliable heating, or anywhere from Draper to Tooele, mini splits offer incredible comfort and efficiency. The installation method you choose should protect that investment, not compromise it.
The bottom line? Mini splits are an excellent choice for modern home comfort. They're more efficient than traditional systems, give you room-by-room control, and yes they're generally easier to install than conventional HVAC systems. Just make sure your installation approach matches your skills, timeline, and comfort level with the technical requirements.
Ready to explore your options? More info about our ductless mini split services or give Air Pros Heating & Cooling a call today. We'll help you figure out the best approach for your specific situation and make sure you get the year-round comfort you deserve installed right the first time.