Vacuuming Your Mini Split AC System: A Step-by-Step Guide
Why Proper Vacuuming is Non-Negotiable for Your Mini Split
To protect your investment and ensure peak performance, understanding how to vacuum mini split AC system properly is critical for homeowners. This vital step during installation or repair removes hidden threats from your system.
Here's a quick overview of why and how:
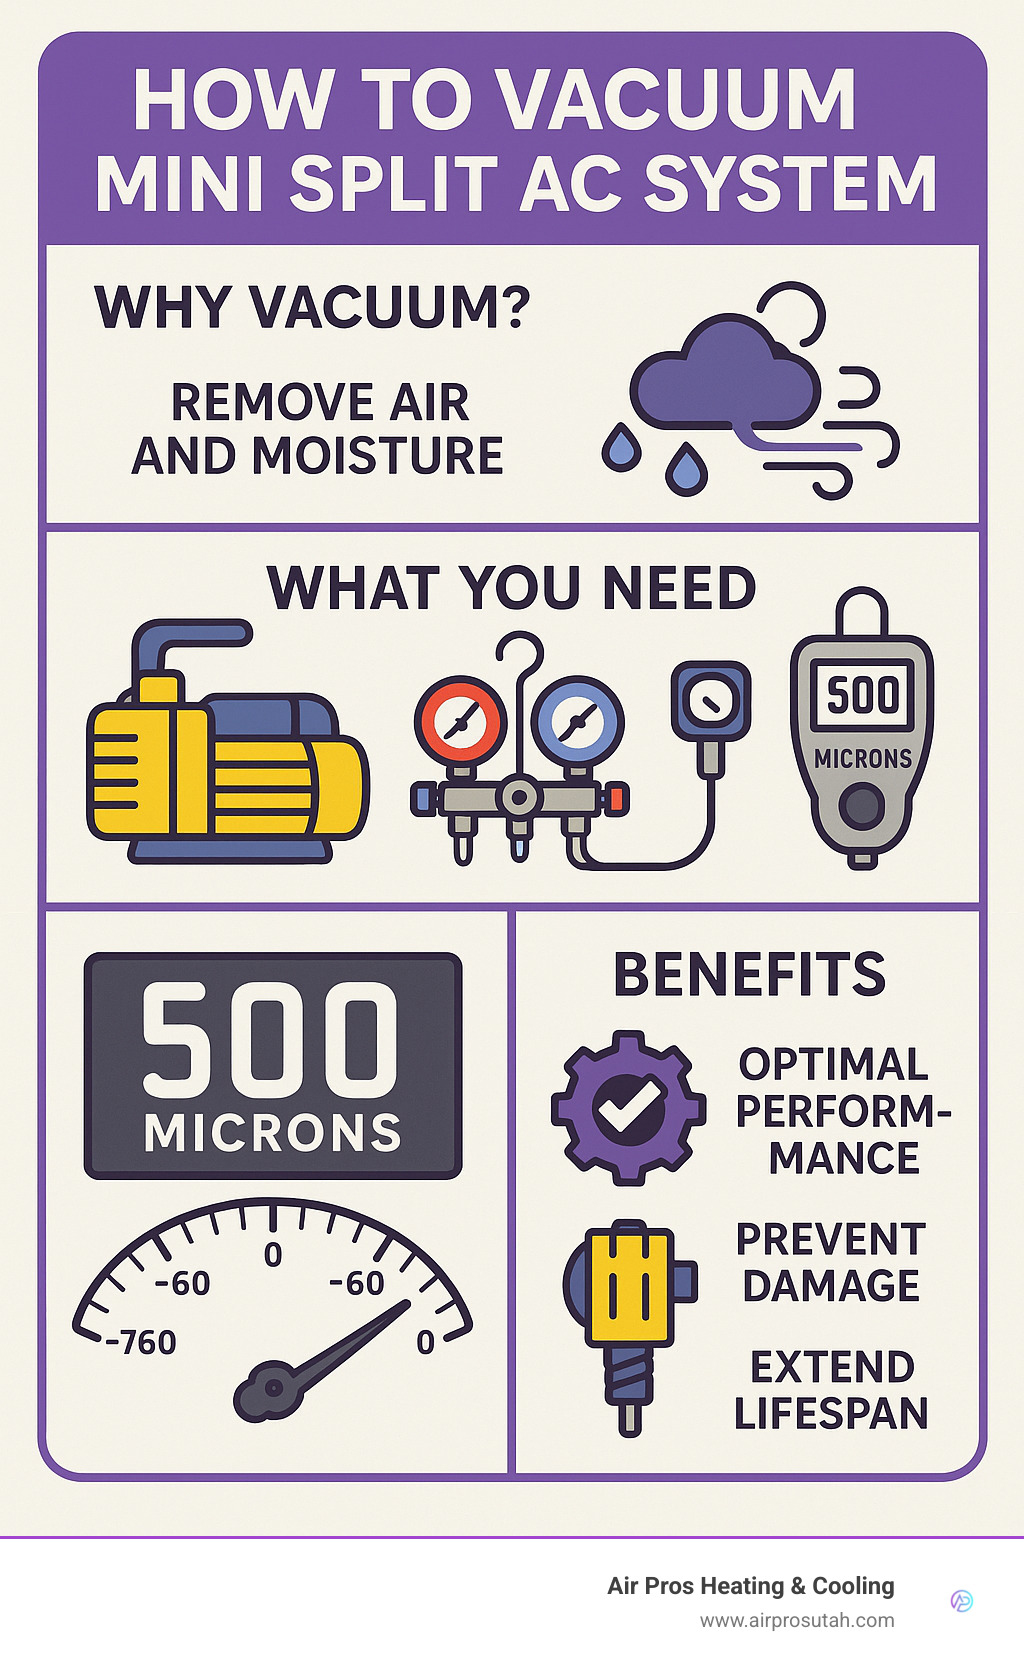
- Why Vacuum? To eliminate air and moisture (non-condensables) from the refrigerant lines.
- What You Need: A vacuum pump, a manifold gauge set, and most importantly, a micron gauge.
- Target Level: Achieve a deep vacuum of 500 microns (or -30 psi on analog gauges).
- How Long: Run the vacuum pump for 15-30+ minutes, then ensure the vacuum holds steadily at the target level for at least one hour.
- Crucial Benefit: Prevents system damage, ensures peak efficiency, and significantly extends the lifespan of your mini split.
Mini-split units offer quiet, efficient comfort, but proper installation is key to keeping them running smoothly. One vital step is vacuuming the refrigerant lines.
This isn't about cleaning filters; it's about removing unseen enemies: air and moisture. If left inside, these "non-condensables" cause serious problems. They shorten compressor life, reduce system capacity, and can even form corrosive acids. These issues mean higher utility bills, inconsistent comfort, and costly repairs.
I'm Alex Wiltz, founder of Air Pros Utah Heating & Cooling. My HVAC career began in a high school trade program, where I built a deep understanding of processes like how to vacuum mini split AC system. Now, let's dive into the specifics to ensure your mini split operates at its best.
Must-know how to vacuum mini split ac system terms:
Essential Tools and Safety Precautions for the Job
Before starting, gather the necessary tools. Precision is paramount. For safety, always turn off the power to your mini split at the breaker and wear Personal Protective Equipment (PPE), including safety glasses and gloves.
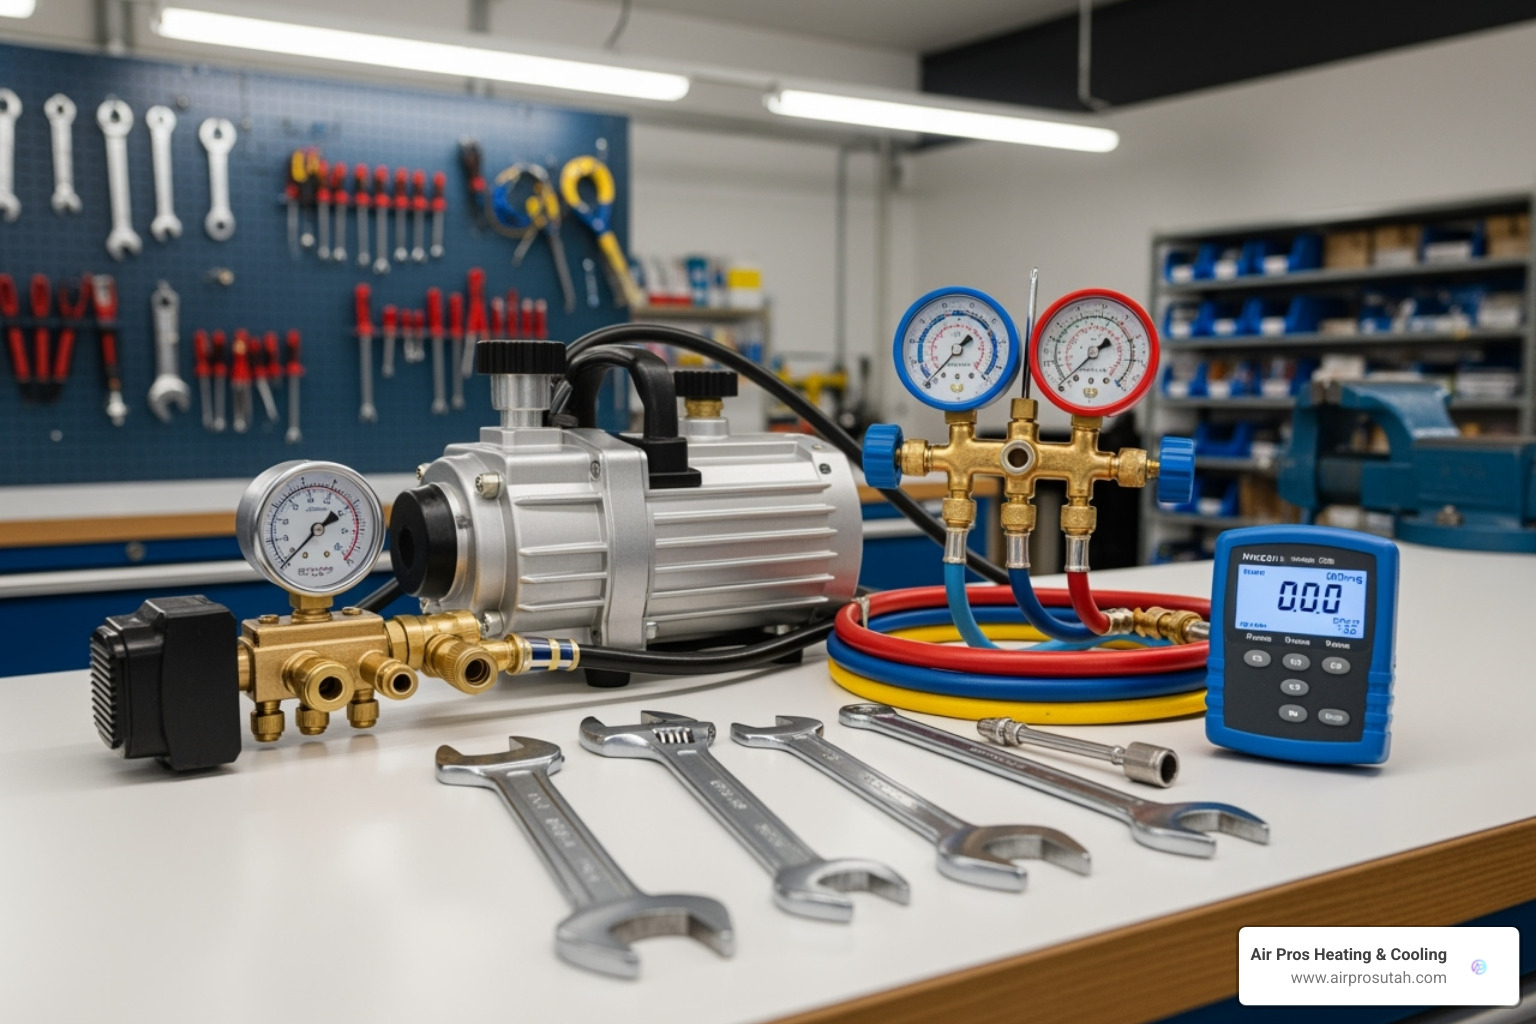
Here's what you'll need:
- Vacuum Pump: The heart of the operation, it pulls a deep vacuum to remove all air and moisture from refrigerant lines.
- HVAC Manifold Gauge Set: Connects to the system and vacuum pump to monitor pressure.
- Micron Gauge: This is critical. Manifold gauges are not sensitive enough for the precise measurements needed. A dedicated micron gauge provides accurate readings in microns, essential for verifying a proper, deep vacuum. Standard needle gauges can't be depended on for this delicate task.
- Refrigerant Hoses: Connect your gauges to the mini split and vacuum pump. Ensure they are in good condition.
- Mini-Split Adapter (if needed): Some systems might require a specific adapter for the service port.
- Adjustable Wrenches: For connecting and tightening all fittings securely.
- Safety Glasses and Gloves: Essential PPE to protect you from potential hazards.
Understanding Your Gauges: Manifold vs. Micron
When it comes to vacuuming, not all gauges are created equal. You'll typically use two types: a manifold gauge and a micron gauge. Understanding their roles is key to a successful vacuum.
| Feature | Standard Manifold Compound Gauge | Digital Micron Gauge |
|---|---|---|
| Purpose | Measures system pressure (positive and vacuum) | Measures deep vacuum in microns |
| Accuracy | Less accurate for deep vacuum (inches of mercury) | Highly accurate for deep vacuum (microns) |
| Reading Vacuum | Reads down to -30 psi or 29.92 inHg (absolute vacuum) | Reads extremely low pressures, typically 0-25,000 microns |
| When to Use | General pressure checks, initial vacuum pull | Crucial for verifying proper evacuation of air and moisture |
Your manifold gauge's vacuum side typically reads in inches of mercury (inHg) or pounds per square inch (psi). While it can show you're pulling a vacuum, it lacks the precision to tell us if all moisture has been removed. This is where the micron gauge shines.
A micron gauge measures vacuum in microns, a unit of pressure much smaller than psi or inHg. For example, 29.92 inHg (a perfect vacuum at sea level) is roughly equivalent to 0 microns. Why does this matter? Because moisture boils at different temperatures depending on the pressure. To ensure all moisture turns into vapor and is pulled out by the pump, we need to get to very low pressures, typically below 500 microns.
ASHRAE (American Society of Heating, Refrigerating and Air-Conditioning Engineers) recommends a vacuum level of under 1000 microns to ensure all moisture is removed from the system. For truly optimal performance and a tight, dry system, we aim for a deep vacuum of 300-500 microns. All vacuum measurements must be made with a micron gauge to achieve this level of precision.
Choosing the Right Vacuum Pump
Selecting the correct vacuum pump is essential for efficient and effective evacuation. Vacuum pump capacity is measured in CFM (Cubic Feet per Minute). This rating indicates how quickly the pump can remove air and moisture from the system.
For typical residential mini-split systems, a 4 CFM pump is usually sufficient. Larger systems or longer line sets might benefit from a 6 to 8 CFM pump. An undersized pump won't properly evacuate the system, while an oversized one is an unnecessary expense. A 6 CFM pump often offers a good balance of speed and versatility for most residential and light commercial applications.
Vacuum pumps come in single-stage and two-stage varieties. Two-stage pumps can pull a deeper vacuum more quickly, which is beneficial for ensuring all moisture is removed. Regardless of the type, ensure your vacuum pump has enough oil. The oil in the vacuum pump traps impurities and prevents overheating. Check the oil level before each use and change it regularly, as dirty oil compromises the pump's performance.
The Complete Guide on How to Vacuum Mini Split AC System
Now that we have our tools and understand the "why," let's dive into the practical steps of how to vacuum mini split AC system. This process is crucial to prepare your line set and indoor unit for the pre-charged refrigerant that resides in your outdoor condenser unit.
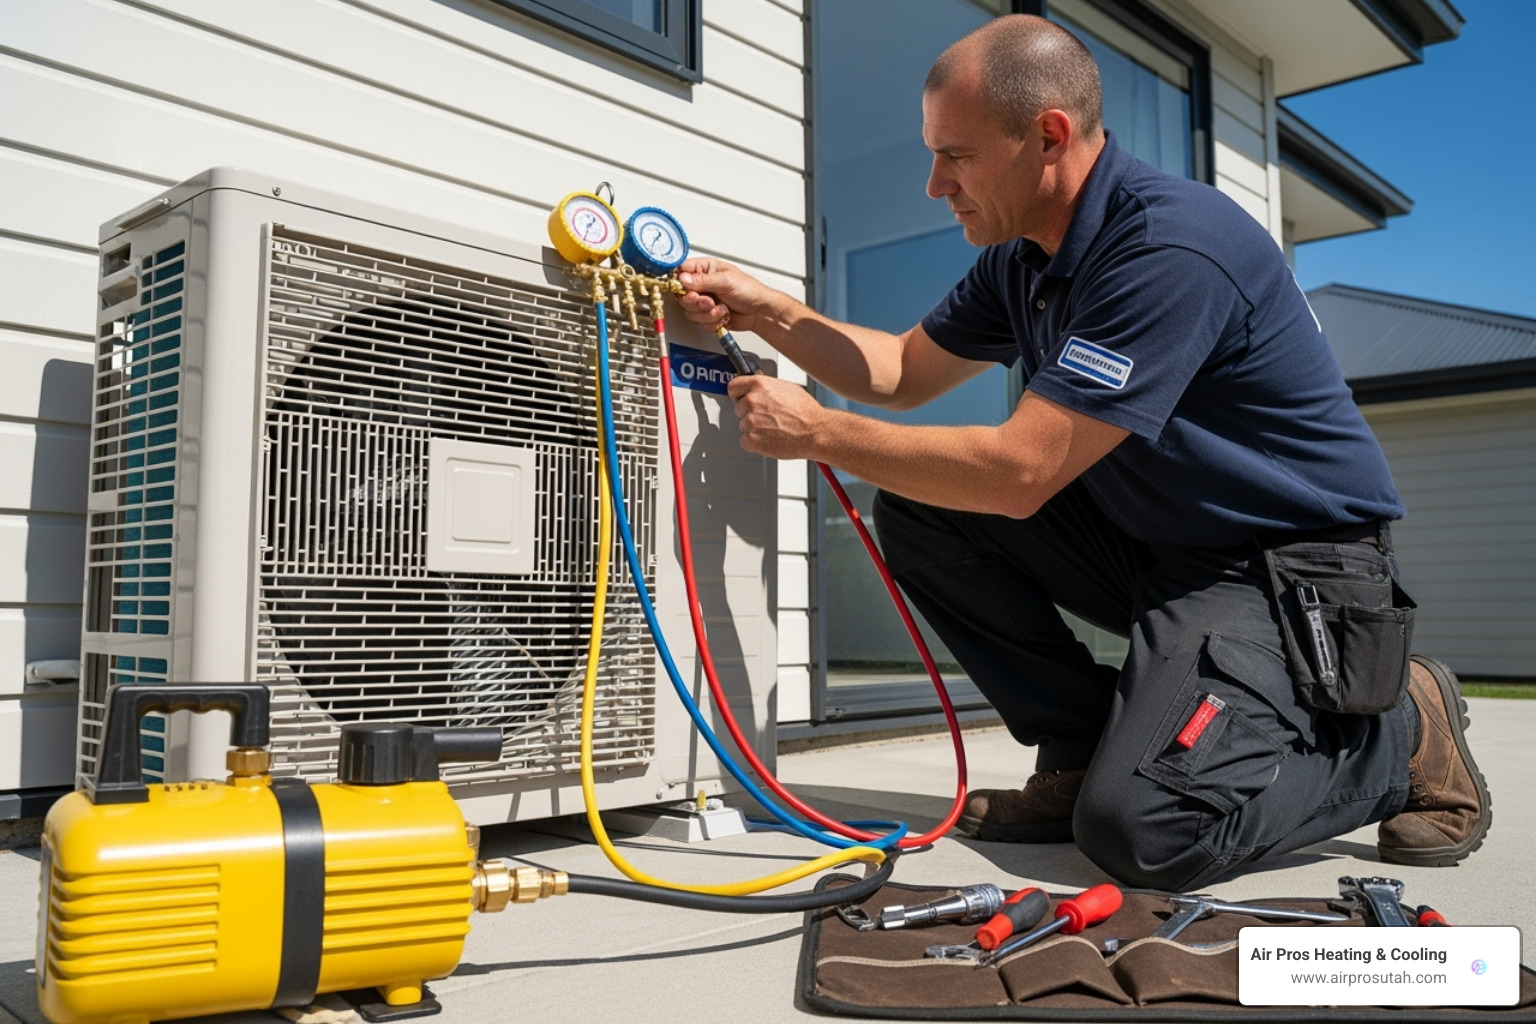
This process creates the perfect environment inside your refrigerant lines before introducing the refrigerant. The outdoor condenser unit is pre-charged, but the copper lines and indoor unit must be completely clean and dry first.
Step 1: Preparing the System and Connecting Your Equipment
Getting your connections right from the start saves headaches later.
Start by checking your flare connections at both the indoor and outdoor units. These copper line connections are like the foundation of a house - if they're not perfect, everything else suffers. Use two wrenches when tightening to prevent damage, and consider applying refrigerant thread sealant like Nylog for extra protection.
Next, remove the service valve caps from your outdoor unit's service ports. You'll typically find two ports - a larger one for the suction line and a smaller one for the liquid line. Keep these caps safe; you'll need them later.
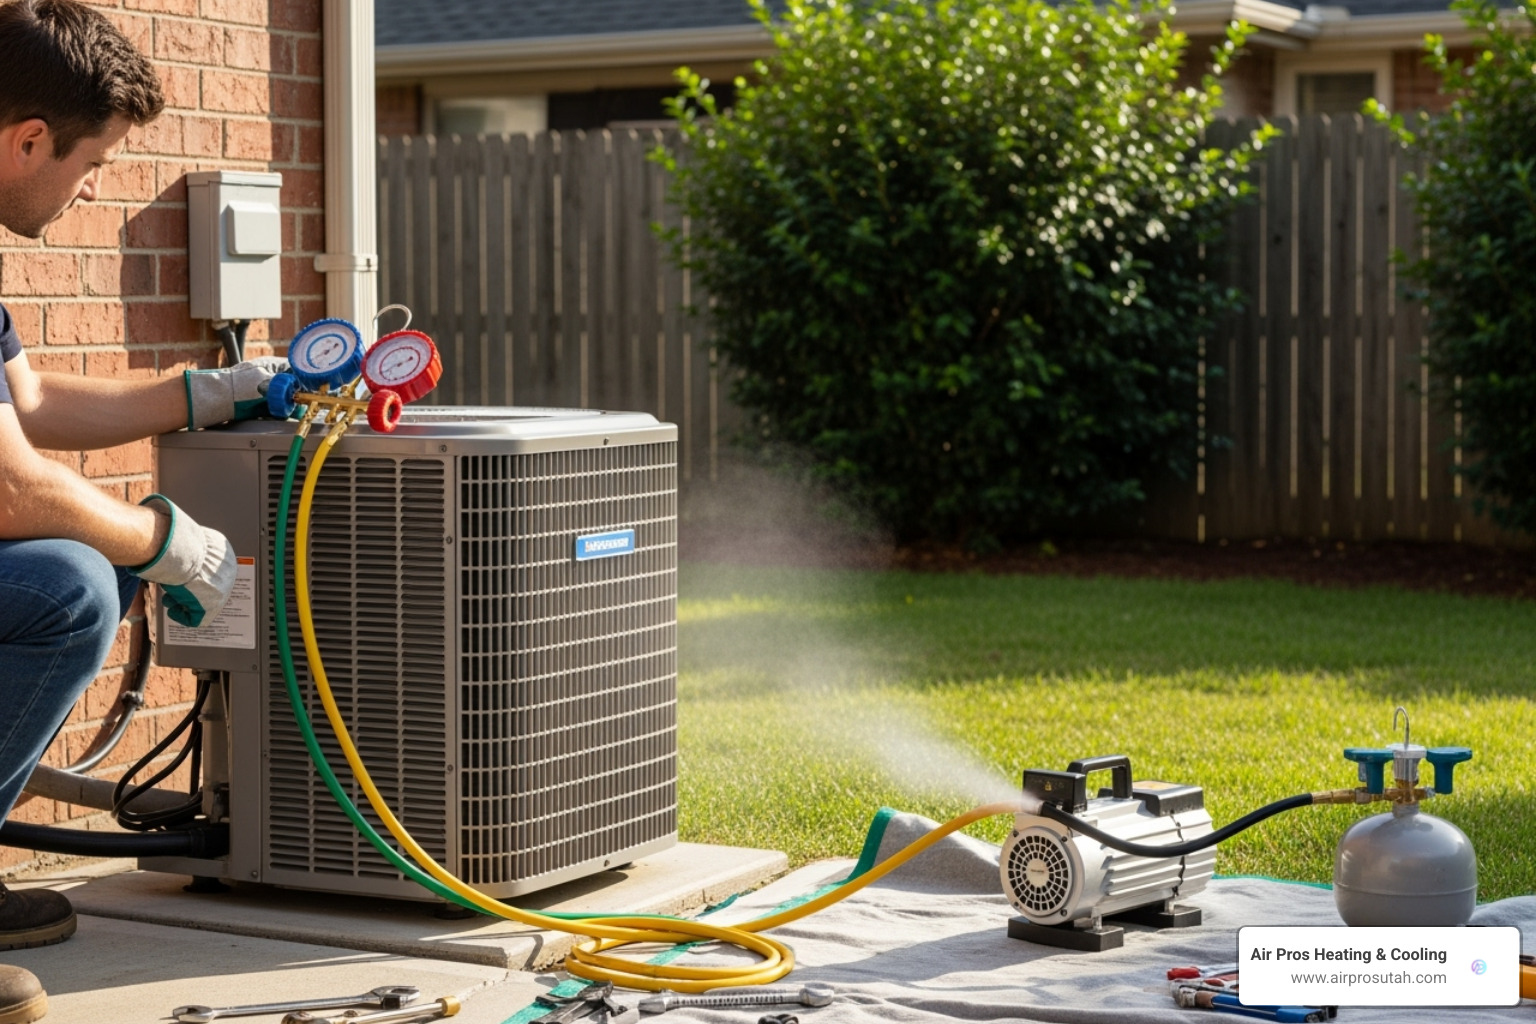
Now comes the connection phase. Connect your low-pressure hose (usually blue) from the manifold gauge set to the larger service port on the outdoor unit. This is where refrigerant normally returns to the condenser. The center hose (typically yellow) goes from your manifold to the vacuum pump's intake.
For the most accurate readings, connect your micron gauge directly to the system rather than through the manifold. This eliminates potential reading errors caused by the manifold itself. Many systems have a dedicated port for this, or you can use a tee fitting.
Before moving forward, double-check that all manifold valves are closed - both high and low side. The service valves on your outdoor unit should also remain closed. We're not ready to release any refrigerant yet!
Step 2: How to Vacuum Mini Split AC System and Monitor the Gauges
With everything properly connected, it's time to begin.
Turn on your vacuum pump once all connections are secure. Don't be alarmed if you see a small mist or "white smoke" from the exhaust - that's just water vapor and tiny oil droplets being expelled. It's actually a good sign that moisture is being removed.
Open the low-side manifold valve slowly. This begins pulling air and moisture from your mini-split system. You'll hear the pump working harder as it starts drawing from the system.
Watch your micron gauge closely - this is where the magic happens. The reading will start high and gradually drop as the vacuum deepens. Your target is 500 microns or lower. ASHRAE recommends staying under 1000 microns, but we aim for that 300-500 micron sweet spot for optimal performance.
How long should you vacuum? Generally, expect 15-30 minutes for most residential mini-split systems, though longer line sets or larger systems may take more time. The pump should run until your micron gauge stabilizes at your target level and that telltale mist from the pump exhaust disappears.
Step 3: Performing the Standing Vacuum Test for Leaks
Reaching your target vacuum is only half the story. The standing vacuum test confirms your system is leak-free and dry.
Close the manifold valve once your micron gauge shows a stable reading at or below 500 microns. If your micron gauge has its own isolation valve, close that too. Then turn off the vacuum pump.
Now your system is isolated from the pump, creating the perfect conditions for leak detection. This is where we perform the crucial 15-minute decay test (though a full hour is even better for absolute confidence).
Watch that micron reading like a hawk. A stable micron reading that holds steady confirms you have a tight, dry system. You might see a small initial rise as any remaining moisture boils off, but it should stabilize quickly and stay put.
If the vacuum rises rapidly, you've got a leak somewhere. Don't worry - we'll cover troubleshooting in the next section. But if it holds steady, you've successfully prepared your mini-split system for refrigerant and reliable operation.
Troubleshooting Common Vacuuming Problems
Even with the best preparation, sometimes things don't go as planned when learning how to vacuum mini split AC system. Don't worry – we've all been there, and these hiccups are more common than you might think.
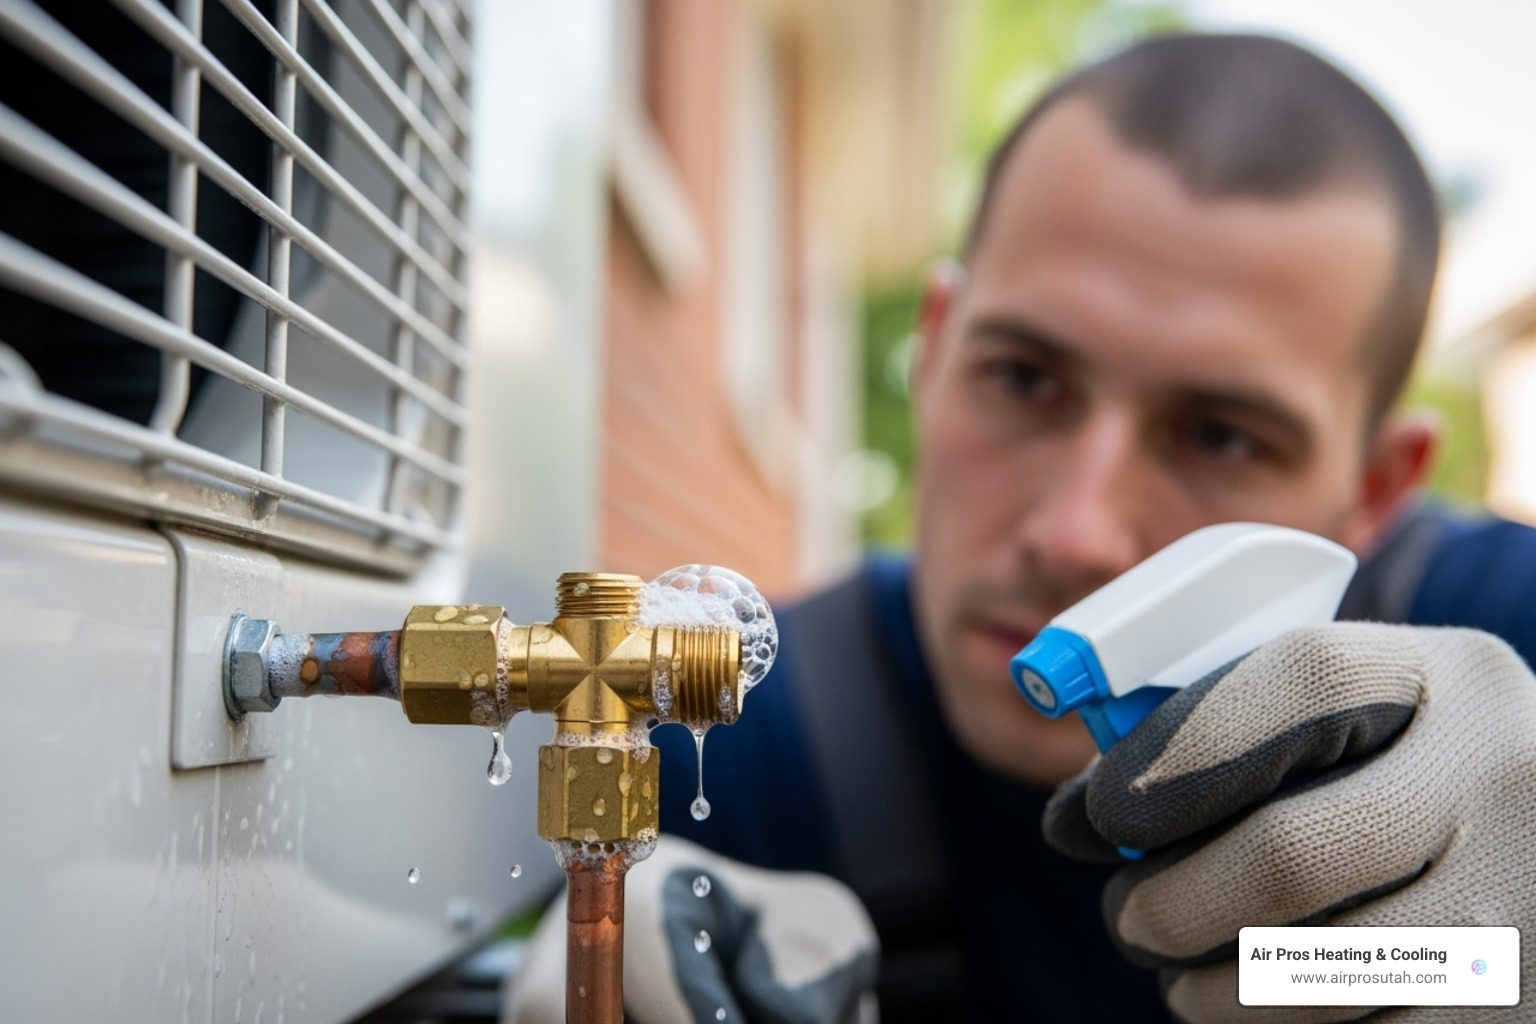
It's frustrating when something goes wrong during vacuuming. Let's walk through the most common issues and how to solve them.
What to Do if the Vacuum Won't Reach 500 Microns
If you've been running your vacuum pump for a long time but the micron gauge won't drop below 1000 microns, you're facing a common problem with several usual suspects.
System leaks are the biggest troublemaker. Even the tiniest leak can prevent your system from reaching that crucial 500-micron target.
Sometimes the problem isn't your mini split at all. Faulty equipment can drive you crazy if you don't catch it early. Your gauges, hoses, or even the vacuum pump itself might have issues. Here's a quick test: disconnect everything from the mini split and connect your manifold gauge directly to the vacuum pump. Turn it on and see if it pulls down to -30 inches Hg or very low microns. If it does, your equipment is fine and the problem lies with the system.
Don't overlook the simple stuff either. A loose hose connection on your manifold can introduce air and ruin your vacuum.
Excessive moisture in the lines is another vacuum killer. When there's a lot of moisture, your pump has to work overtime to vaporize and remove it all. That white mist coming from your pump's exhaust? That's often moisture boiling off. The role of moisture in achieving a deep vacuum is significant – if the system is wet, it may take much longer to reach your target, or you might need to employ special techniques like triple evacuation.
How to Identify and Fix Leaks in the Line Set
We have reliable methods for finding leaks.
Nitrogen pressure testing is our go-to approach. After evacuating the system to a preliminary vacuum, we break that vacuum by introducing dry nitrogen to a positive pressure of around 150-200 PSI. Let the system sit under this pressure for at least 15 minutes – longer for bigger systems. Any drop in pressure tells you there's a leak somewhere.
Once you've got positive pressure in the system, grab some soapy water and start investigating. The soap bubble test is simple but effective. Apply that soapy solution to all the usual suspects: flare connections, valve caps, and any other fittings. Look for bubbles forming – they're your leak indicators. Just remember, never introduce water while pulling a vacuum.
For those sneaky little leaks that laugh at soap bubbles, an electronic leak detector can be your best friend. These sensitive devices can sniff out leaks too small for other methods to catch.
Common leak points are usually the flare connections – they're the most likely culprits in any mini split installation. If you find a bad flare connection, don't try to band-aid it. Cut it off and re-flare the copper line properly using quality tools. A perfect flare connection is worth the extra effort.
If you're dealing with persistent leaks that seem impossible to track down, don't hesitate to call in the professionals. Sometimes a fresh set of experienced eyes makes all the difference. For complex situations, check out our detailed guide on Ductless Mini Split Repair.
Why Did My Gauge Drop After Closing the Manifold?
If you've pulled a vacuum, closed the valve, and the micron gauge reading starts climbing, don't panic. This tells us what's happening inside your system.
The key is understanding what you're seeing. Differentiating between a leak and moisture comes down to how fast and how far that pressure rises.
If your gauge rapidly rises back to atmospheric pressure (essentially slamming back to zero), you've got a large leak. The system is equalizing with outside air pressure almost immediately. This calls for serious leak detection work.
But if the pressure rises slowly and then stabilizes at a higher micron level – say 2000 to 3000 microns – you're likely dealing with moisture boiling off. Here's what's happening: residual moisture in the system turns into vapor, which increases the pressure until it reaches equilibrium at that specific vacuum level. It's actually the moisture telling you it's still there.
When moisture is the issue, you might need to get more aggressive. The triple-evac method works wonders here: pull a vacuum, break it with dry nitrogen (which helps absorb moisture), pull another vacuum, and repeat to flush out stubborn moisture.
Understanding these patterns helps you diagnose problems quickly and accurately. A stable micron reading after the standing test confirms you've got a tight, dry system that's ready for refrigerant. If the reading won't stabilize or keeps climbing, you've got more work to do.
Frequently Asked Questions about Mini Split Vacuuming
How often should I vacuum my mini split system?
Homeowners often wonder if vacuuming a mini split is a regular task like cleaning filters. It is not. Vacuuming your mini split system is not regular maintenance. It's a critical step performed only at specific times for your system's long-term health.
So, when is it necessary to know how to vacuum mini split AC system? There are really only a few key situations. The most important time is during the initial installation of your brand-new mini split. Before any refrigerant is let into the lines, they must be completely cleared of air and moisture.
You'll also need a vacuum if your system has undergone a significant change, such as after a refrigerant line repair. If any part of the refrigerant tubing is opened up for fixes or replacement, any air or moisture that entered needs to be removed. Similarly, if a leak is suspected or refrigerant needs to be added or removed from the system, it's crucial to vacuum the lines after the repair and before putting new refrigerant in.
Unless one of these specific events happens, you won't need to vacuum your mini split. For all other general care and to keep your system running smoothly year-round, you can learn more about ductless system maintenance.
Can I vacuum a mini split system myself?
While the DIY spirit is admirable, vacuuming a mini split is a task best left to professionals. It's a critical process where mistakes can be costly.
Why? Well, for starters, you need specialized tools to do the job right. We're talking about a high-quality vacuum pump, a precise manifold gauge set, and, most critically, a micron gauge. These aren't your everyday tools; they can be quite expensive for a one-time use, and renting them doesn't always guarantee they're in top working order or properly calibrated.
More importantly, there's a significant risk of system damage. If the vacuuming isn't done perfectly, you'll leave behind those hidden enemies: air and moisture. These 'non-condensables' can really harm your mini split, leading to reduced efficiency, a shorter compressor life, and even major failures from acid forming inside the system. A botched vacuuming job can literally cut years off your unit's life and could even void your warranty.
Then there are the EPA regulations and safe refrigerant handling rules. Refrigerants aren't just any gas; they're regulated substances. Handling them improperly can hurt our environment and is actually against federal law. Certified HVAC technicians go through special training to handle refrigerants safely and correctly. They also know about crucial tests, like the 'blank off test,' to make sure your system is sealed tight.
So, while the idea of a DIY project might appeal, for something as vital as vacuuming, the expertise of a certified HVAC technician is truly invaluable. They have all the right tools, deep knowledge, and the necessary certifications to ensure the job is done perfectly and safely, protecting your investment for years to come.
What is the difference between vacuuming the lines and cleaning the filters?
Homeowners often confuse 'vacuuming the mini split' with 'cleaning the filters.' These are two very different procedures, and both are vital for your mini split's health.
Let's talk about vacuuming refrigerant lines first. This is a highly technical, behind-the-scenes procedure. It involves using a special vacuum pump to pull all the air and moisture out of your mini split's sealed refrigerant lines and indoor coil. This is usually done during installation or a big repair. Its whole purpose is to get rid of tiny contaminants on the inside that could hurt your compressor or make your system less efficient. And just to be super clear: you definitely don't use your household vacuum cleaner for this!
Now, cleaning air filters is a totally different ball game. This is a simple, regular chore that every homeowner can (and should!) do themselves. It's about taking out the washable filters from your indoor unit and cleaning them – usually with a rinse under the tap or a quick pass with your household vacuum's brush attachment. This gets rid of dust, pet dander, and other bits that collect there. Doing this helps your unit breathe better, keeps the air in your home cleaner, and ensures your system runs efficiently.
Think of it this way: vacuuming the lines is a technical procedure for internal health, while cleaning filters is regular hygiene. Both are crucial for your mini split but tackle different needs. Keeping your filters clean is absolutely key to improving your home's Air Quality.
Conclusion: Ensuring Peak Performance for Your Mini Split
Understanding how to vacuum mini split AC system properly isn't just a technical detail; it's a vital step to ensure your mini split's longevity and efficiency. Proper vacuuming is essential to protect your investment and keep your home comfortable for years to come.
Let's quickly recap the big takeaways. First, vacuuming is critical because it gets rid of all that unwanted air and moisture. If you leave those "non-condensables" in there, they can damage your compressor, make your system work harder (and cost you more money!), and even lead to expensive repairs down the road. Second, always use a micron gauge. Those regular gauges just aren't precise enough for the deep vacuum we need. A good micron gauge is your best friend for making sure you hit that sweet spot of 500 microns or less. Finally, don't skip the standing vacuum test. This simple test confirms your system is perfectly sealed and dry before any refrigerant is added. This proper evacuation ensures not just system longevity but also top-notch energy efficiency.
While we've walked through every step, this is a detailed and complex procedure requiring special tools and a keen eye. For tasks this important, the expertise of a certified technician is invaluable. At Air Pros Heating & Cooling, we provide custom, high-quality heating and cooling solutions for year-round comfort.
We pride ourselves on clear communication, fair pricing, and building lasting relationships with our customers. We specialize in ductless mini split HVAC systems, which are fantastic for room-by-room climate control, saving energy, and giving you personalized comfort. So, whether you're in Alta, Bluffdale, Coalville, Cottonwood Heights, Draper, Emigration Canyon, Granite, Heber City, Herriman, Holladay, Kamas, Kearns, Magna, Midvale, Midway, Millcreek, Murray, Oakley, Park City, Riverton, Sandy, South Jordan, South Salt Lake, Taylorsville, Tooele, West Jordan, West Valley City, White City, or right here in Salt Lake City, Utah, we're ready to help.
Don't leave the health of your mini split to chance. For complete peace of mind and professional service that protects your investment, reach out to us. You can get professional help with your Ductless Mini Split from Air Pros Heating & Cooling today!


